0
17
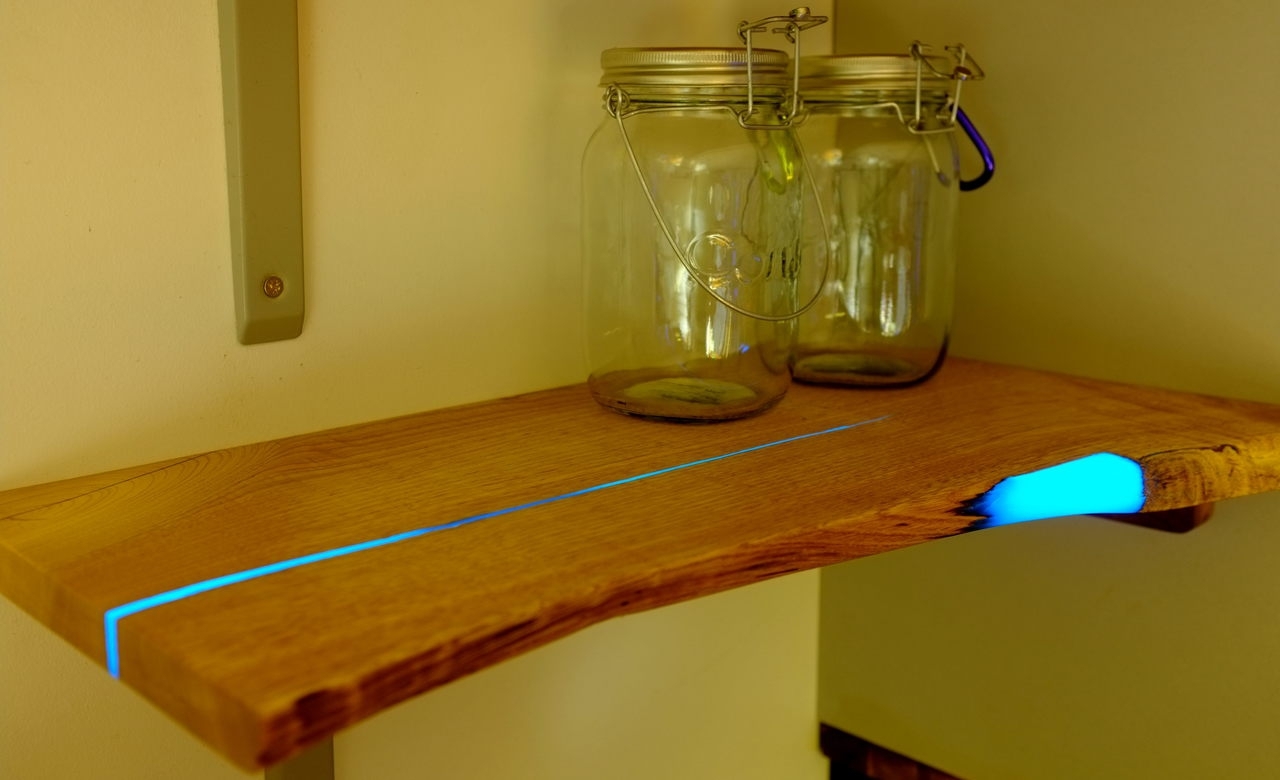
A homemade shelf is pretty cool but this one is cooler than most.


Now it's time to mix the resin. Give it a good mixing and then add your pigment. If you warm it up a bit, on a heater or with a hairdryer or something, the bubbles will pop out of it much more easily. Bubbles can ruin resin casts, so carefully mix and warm the resin, then let it sit for a while, before pouring. It's going to take hours, even days, to cure, so half an hour to de-bubble isn't a problem.


So, pour it in, and wait. Come back in an hour or so to make sure none of your seals are leaking. If they are, slap some more tape on and refill with resin.


However long you think it's going to take, leave it longer. This was poured in spring so took three days before it felt hard to the touch, then I left it another three days just to be sure. Now, peel off your tape and it's time to sand/plane/etc.

The overpour around the edges where the resin has soaked into the wood is going to be a pain to remove. But I can already tell this is going to look amazing.

Chestnut is hard! But eventually, it was done. I cut the big piece into the three shelves it was going to be, and on to my favourite part. Boiled linseed oil cut with white spirit. I love that first wipe of oil when the grain of the wood just leaps out at you. Makes all those hours of preparation worth it. Gave it about eight or nine thin coats, looks incredible.


Now it's time to get these up. The brackets are grey to match the colour the wall is going to be once it's been repainted. I had some bits of walnut around to make the other brackets.


Source:
Новости партнёров
реклама


